Planck keyboard
When I bought a mechanical keyboard a few years ago, I told myself this is the last keyboard I'll need. Then a friend told me about homemade keyboards and it didn't take long for me to tumble down the rabbit hole.
It took me a while, but in the end, I decided on a Planck. A keyboard with only 60% of the keys of a regular keyboard. The idea behind small keyboards is that you don't have to move your hands as much since all of the keys are in reach. The "missing keys" are then located on layers, which you access with the "LOWER" and "UPPER" keys. For example, on most Planck layouts, pressing "LOWER" and "Q" produces a "1", and pressing "UPPER" and "Q" produces an "!". The layers are fully customizable of course.
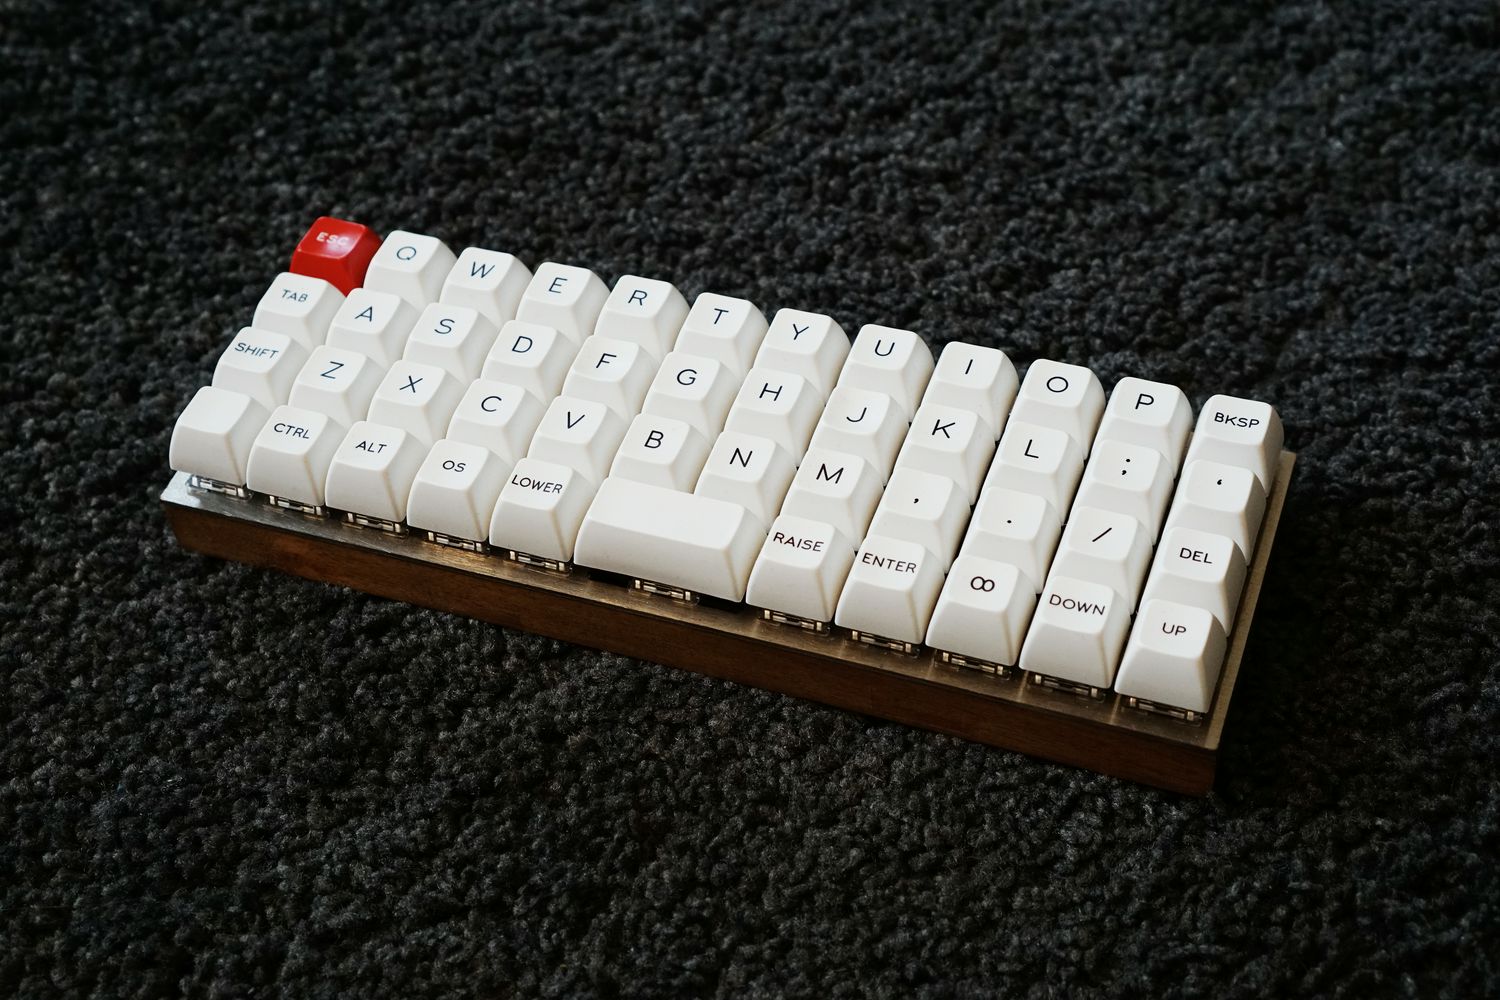
My main usage is programming, so the biggest changes I did from a vanilla Planck layout, was that I moved the enter key to be on the thumb, not the pinky, and I also moved the arrow keys to be on a "LOWER" layer on "DXCV" keys. That actually helped a lot with the pain caused from bending my wrist in a weird way when using the regular arrow keys a lot.
Depending on the keyboard you choose to build, there are different levels of DIY-ness. Ranging from kits, some requiring no soldering, to making everything but the switches and keycaps yourself. I went for the middle ground: buy a base plate, then wire the switches and make the case myself.
Parts:
- Ice Cap SA keycaps
- Zealio purple switches
- Planck steel baseplate
- Arduino Pro Micro
- Wooden cutting board for the case
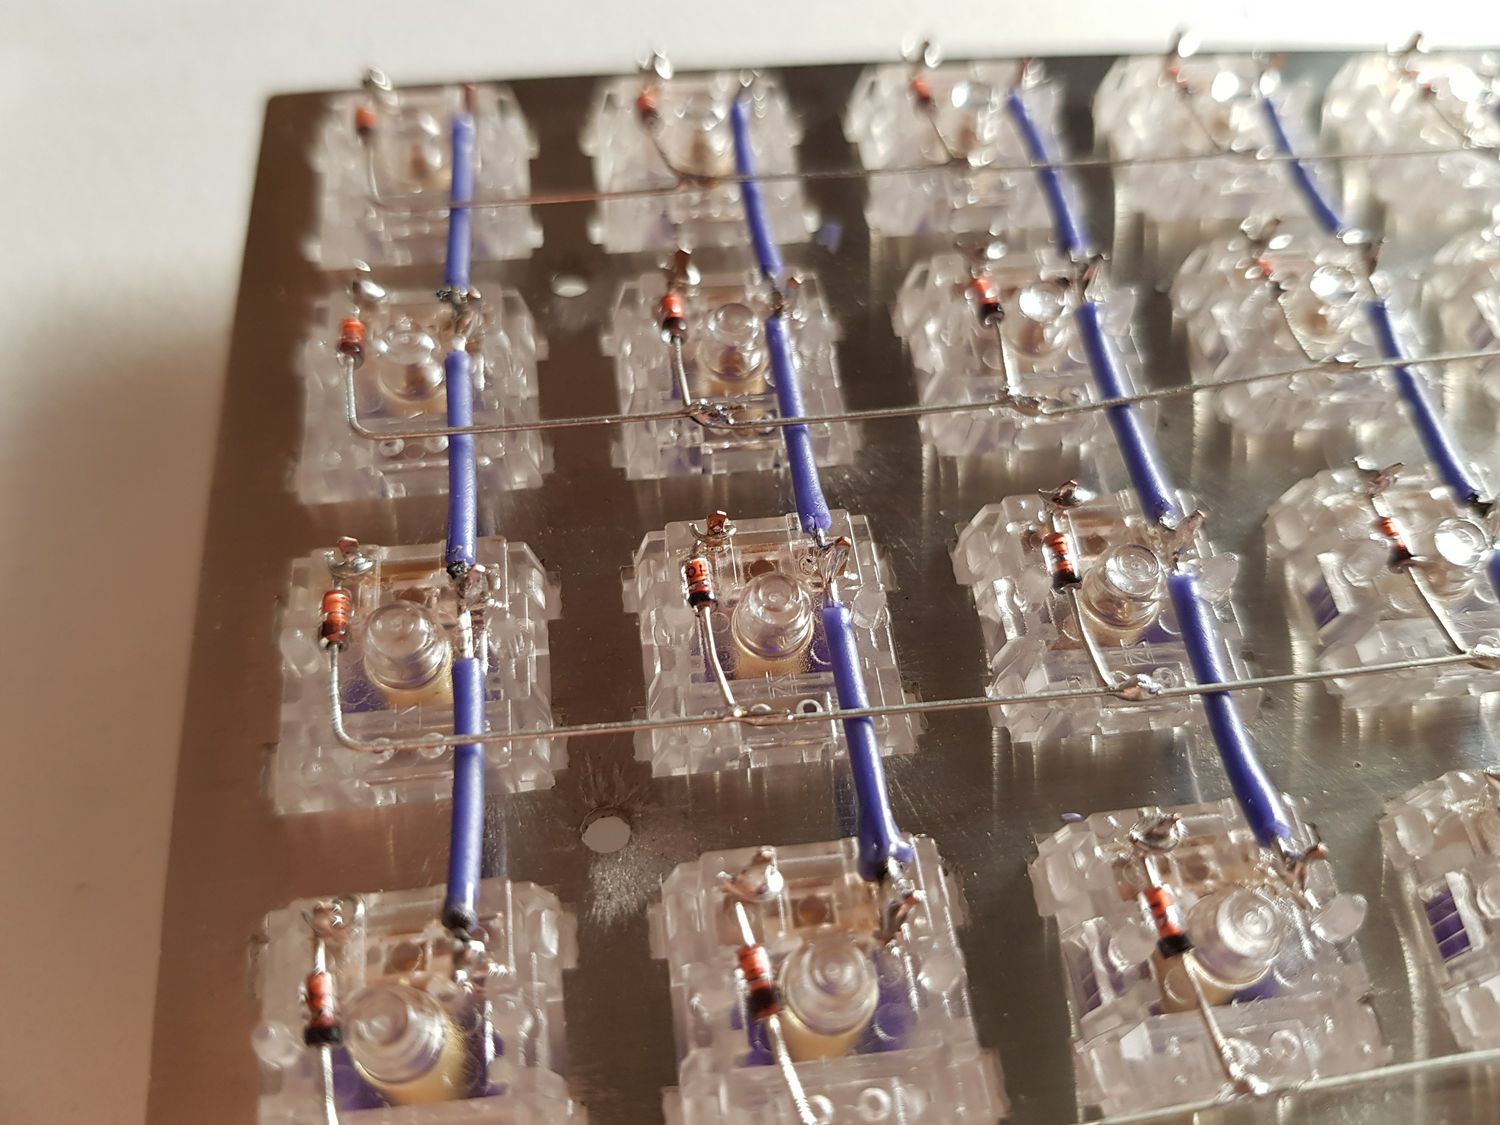
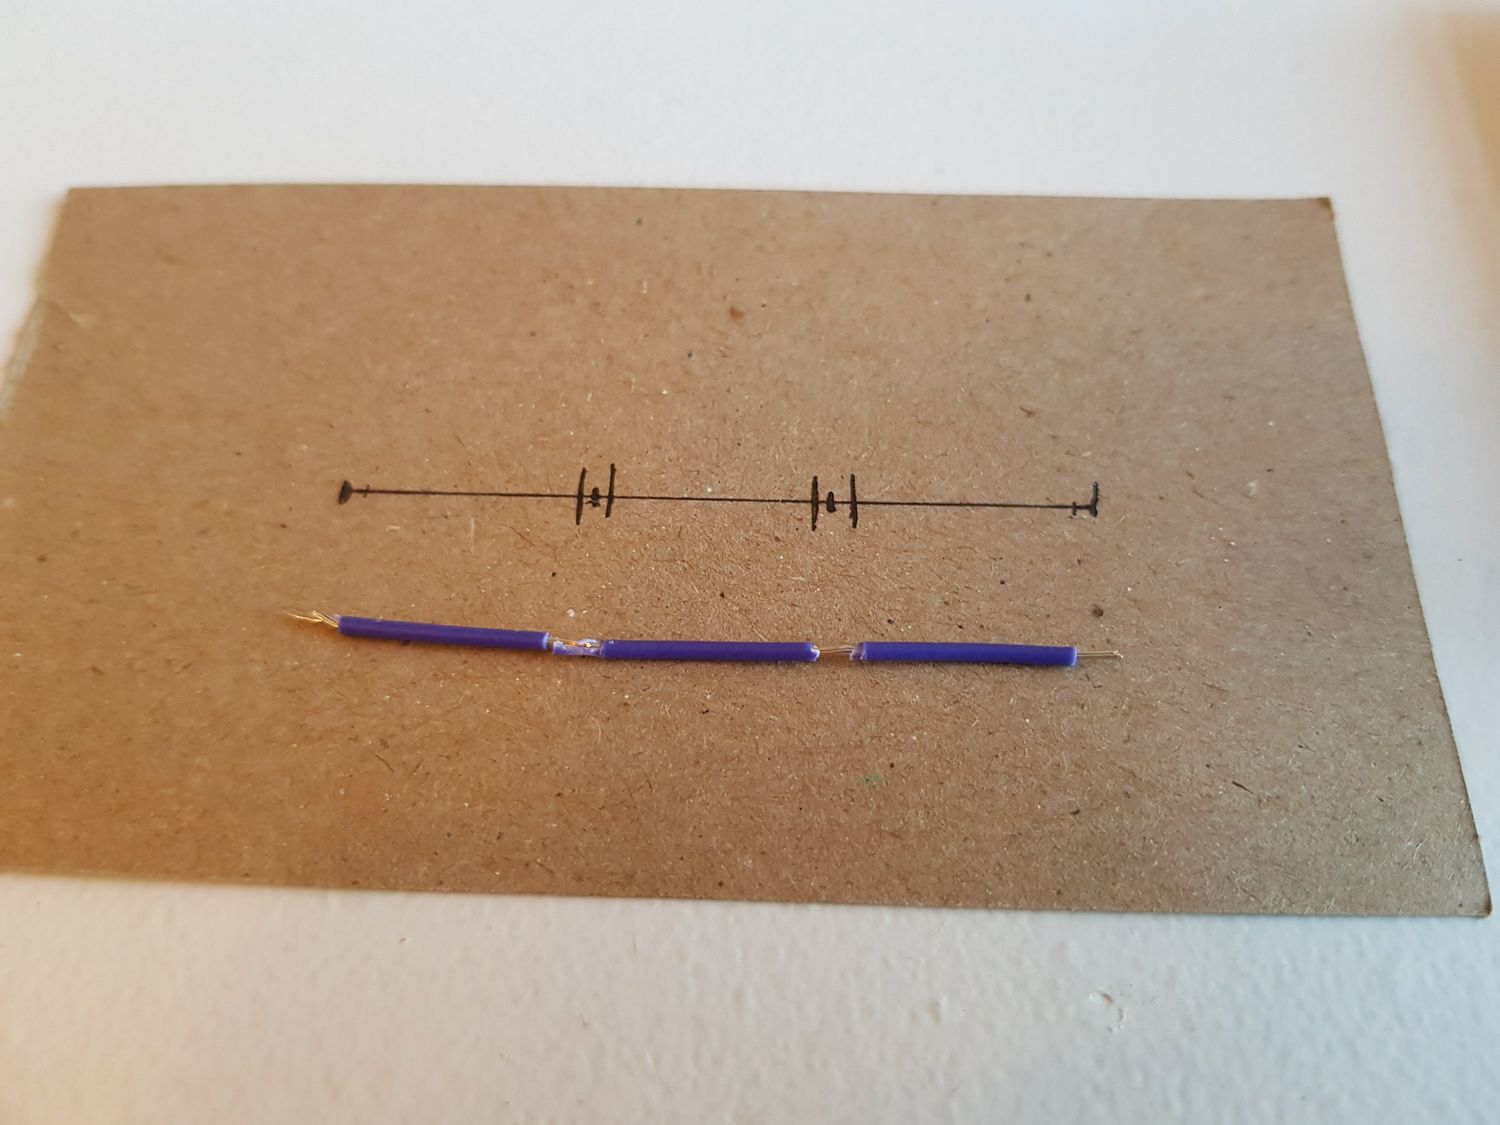
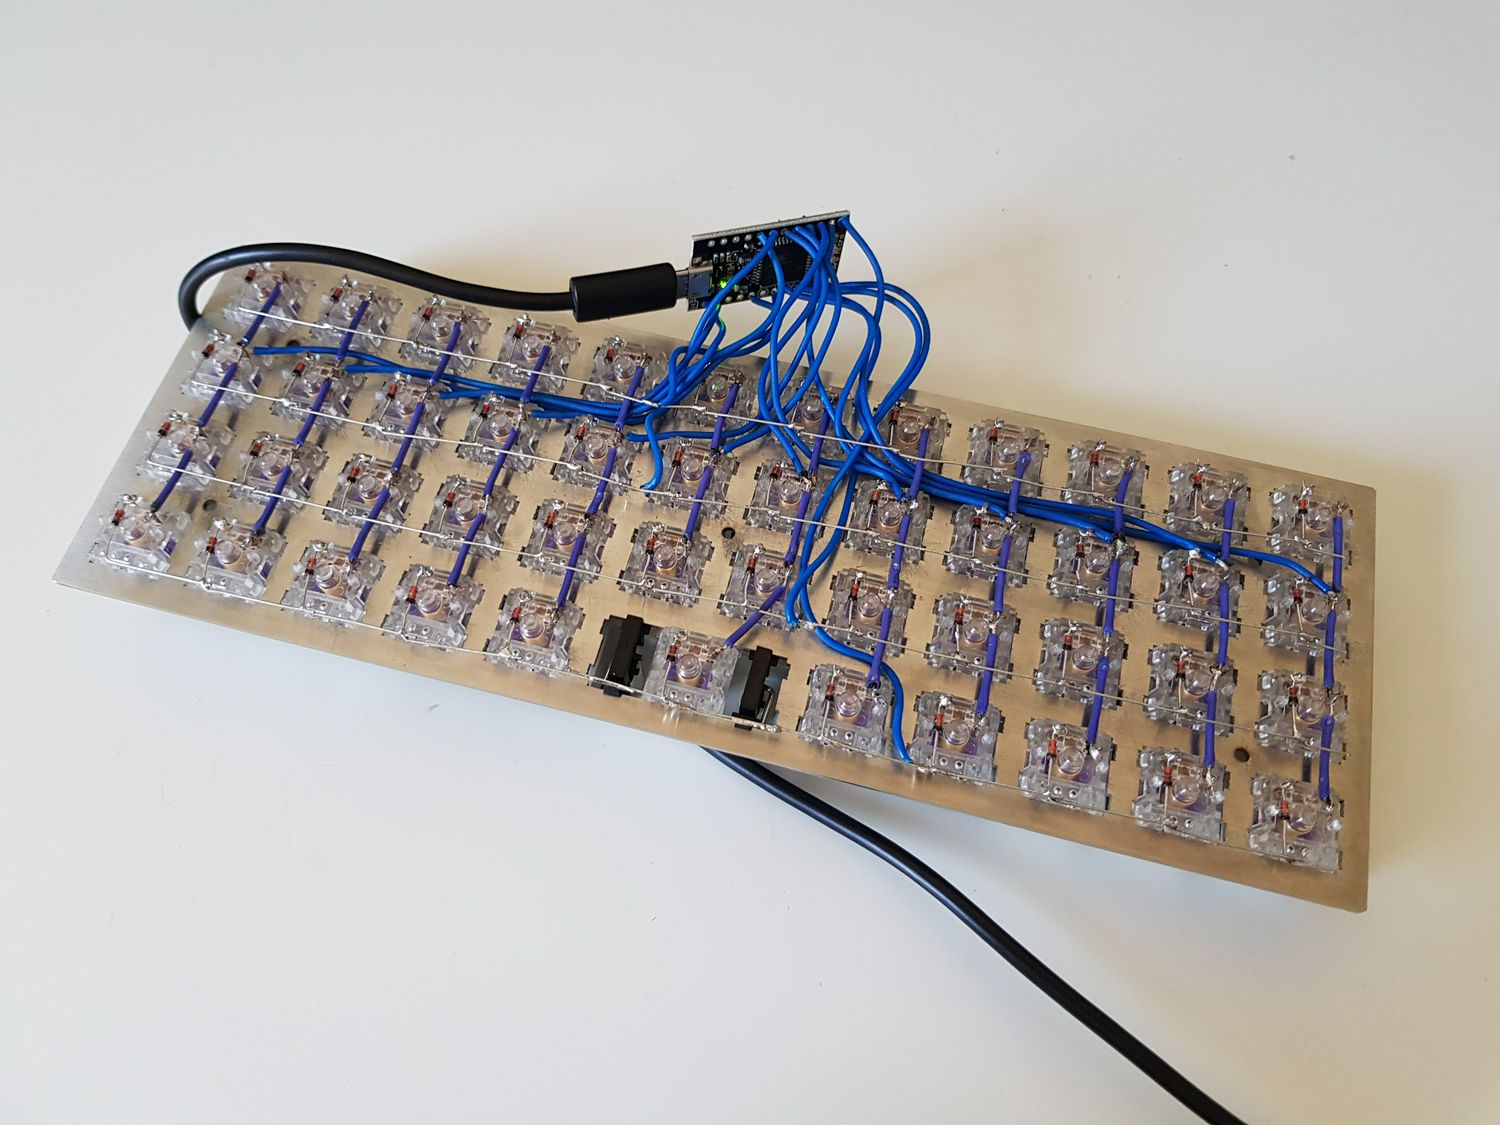
The first step was to wire the switches into a matrix. There are detailed guides out there on how to do this, so I won't go into detail here. The process was was easier than expected, it just took a while. Connecting the rows is very easy with the long wires of the diodes. For the columns I needed to prepare short pieces of wire, making a template sped the process up.
When the switches were connected into a matrix, I could solder the Arduino connections, flash it with QMK firmware, and test that it works.
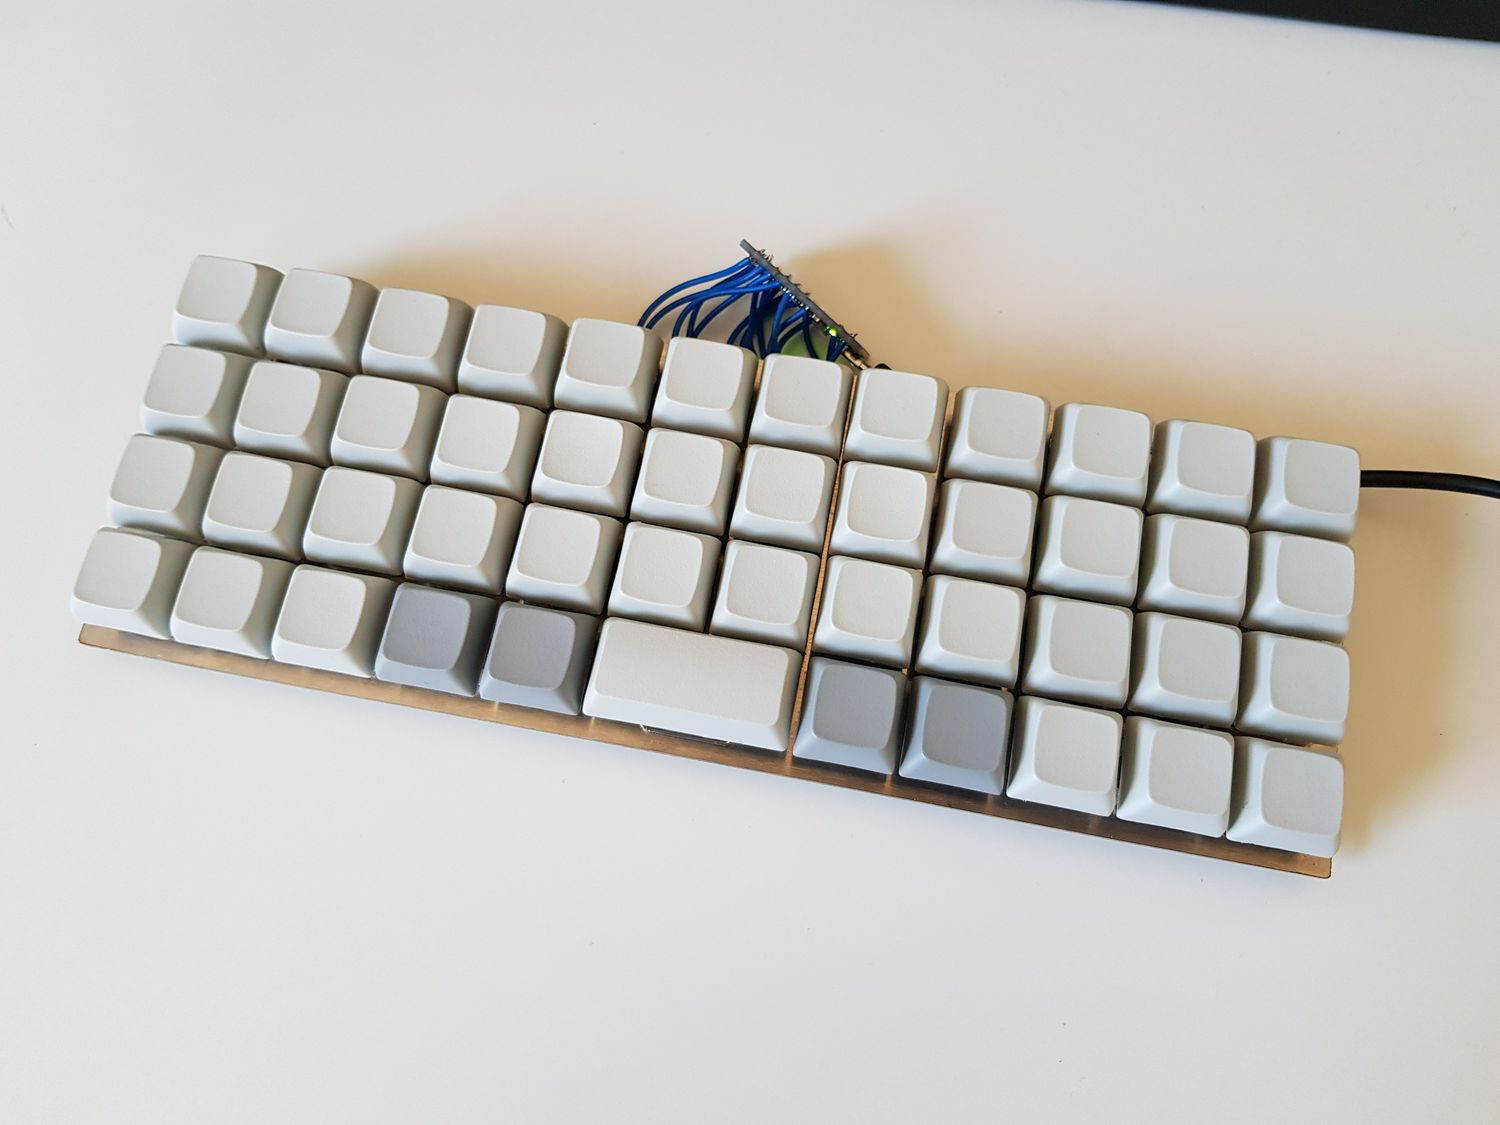
The last part of the build was making a case. Finding the right wood wasn't easy as we needed a plank of hardwood that's also roughly the correct thickness. Luckily we found discounted cutting boards made out of acacia wood. My friend was a member of a local maker space where we could CNC the wood.
After a while, I ordered the Ice Cap SA keycaps to replace the blank ones. They were a bit pricey, but hey, this is the last keyboard I'll ever need, right?
